
- Frequently Asked Questions

- All About Features
- How to Install the Tracking Code
- User Guides
- Integrating With Other Platforms
- Legal, Data Privacy & Certificates
- White Label Analytics
- Glossary
- Affiliate Program
- Contact
How to Install the Tracking Code
Installing the JavaScript Snippet for Better Analytics
What is a Tracking Code?
It's a small piece of code that our analytics platform needs adding to your website's source code in order to collect and analyze data. This JavaScript snippet is unique to each site that you add to your account.
The tracking code is provided during the initial onboarding process, and whenever you start adding a new site to your account. It has to be dropped into the site's HTML - right before the closing </body> tag.
But installation will vary depending on your technical environment, including whether you have a standalone website or use a website building platform, and this page will guide you through the process.
Choose from Three Installation Options

For Standalone or HTML Websites
Our analytics tools are compatible with all website builder platforms. Before manually integrating the tracking code, check whether an installation guide is listed further down this page. But if you are either unable to find your platform or are running a standalone website, follow the installation steps below to manually add the tracking code to your webpages:
Step 2:
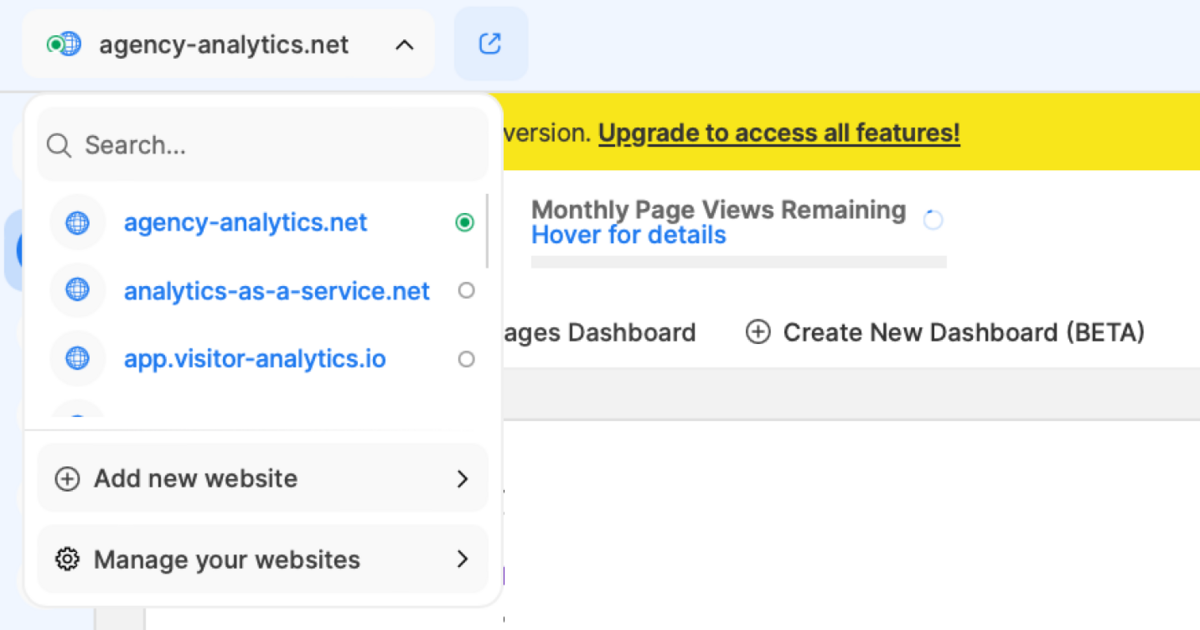
Navigate to [Add New Website]
New sign ups will be automatically funneled into the onboarding process, which includes adding the tracking code to their first website.
Existing users can activate this installation process for a new site by:
Clicking on the in-app website dropdown selector.
Choosing [Add New Website].
Step 3:
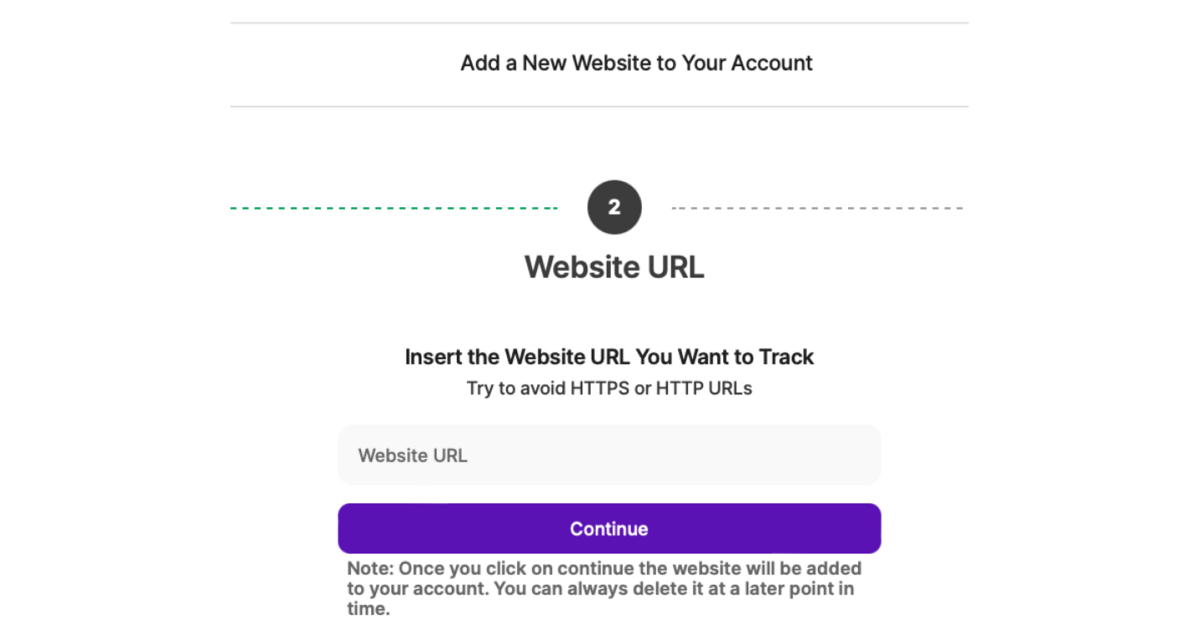
Add the website URL
Select the [No I Don't Use Any Platform From Above] option and paste in your website homepage URL.
We recommend that you copy this from your browser's address bar to avoid making a mistake.
We also advice that you don’t include the protocol, and just copy the URL from “www” onward (leaving out the HTTP/HTTPs scheme at the beginning).
Step 4:
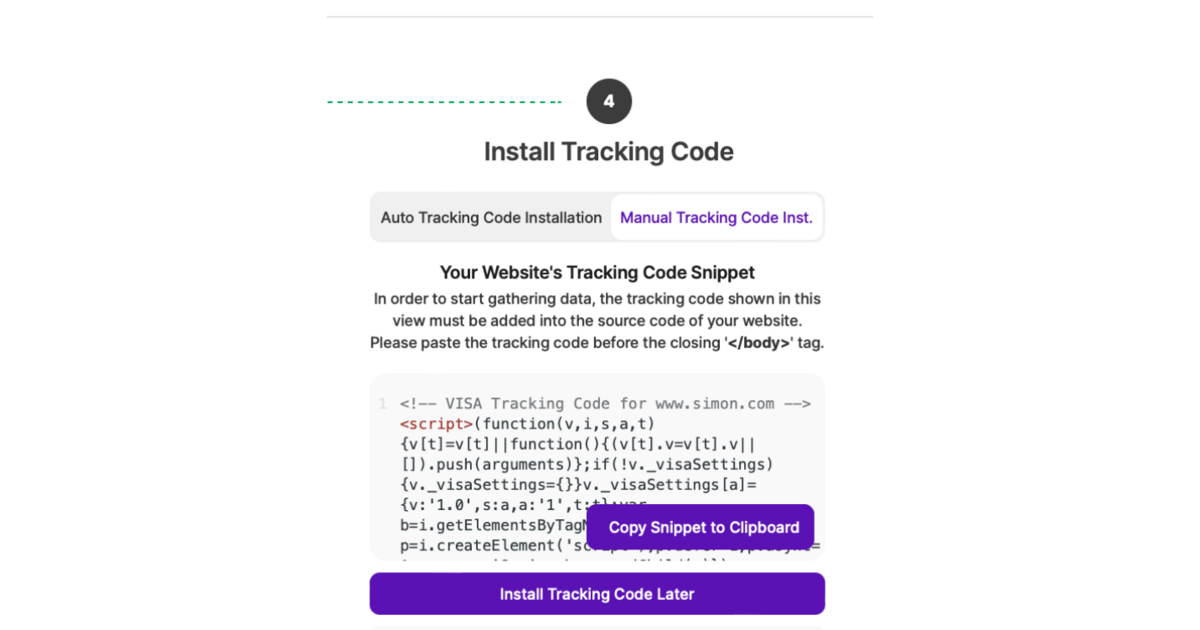
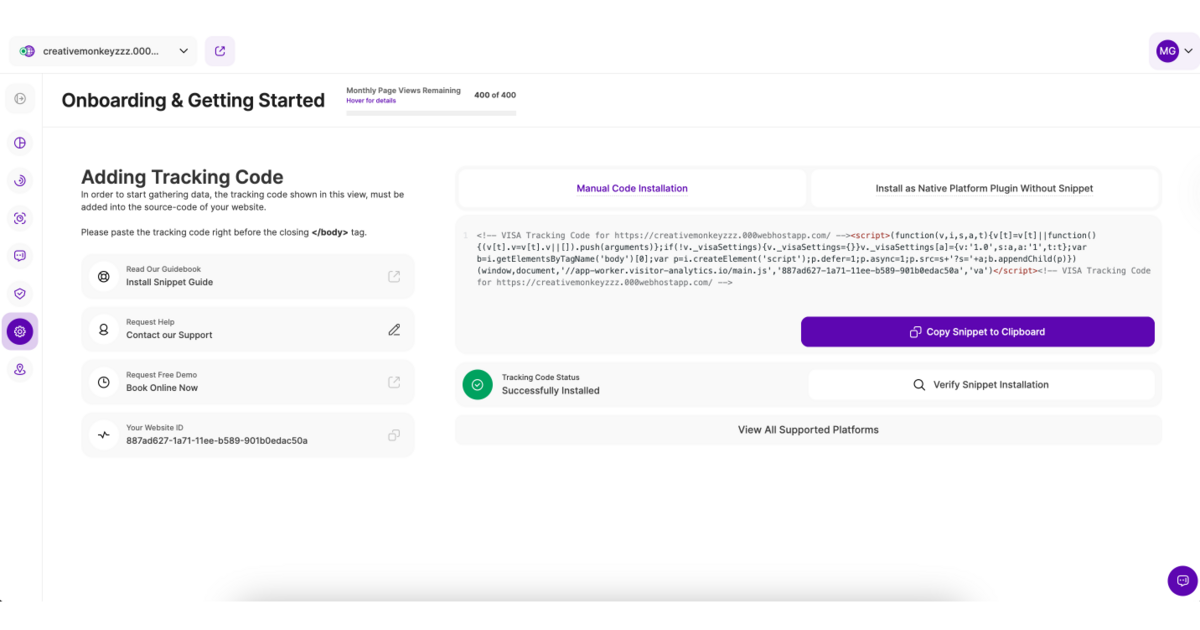
Copy the generated tracking code
After selecting the data privacy mode for the website, choose the [Manual Tracking Code Instructions] option, and you'll be provided with the tracking code snippet you require.
Use the [Copy to Clipboard] button to avoid having to save the tracking code by hand or missing out any characters.
Note: When you need to install the tracking code in another webpage, you can find it in the [Manage Account Website(s)] section of [Account Settings].
Step 5:
Paste the code into webpage source codes
The tracking code will need to be pasted into the source code of each page that makes up your website.
This can be done by opening up the webpage index file, which contains the relevant source code. If you can't access these files, then you may need to ask your website hosting provider for access.
These index files can normally be found in your file management folder, but the exact location will be different from website to website.
Then, drop in the tracking code. It needs to be pasted right before the closing </body> tag, near the bottom of the index file. Don't forget to purge the cache and publish changes afterwards.
Note: the tracking code is the same for all pages that make up the website, and it can always be found in the [Manage Account Website(s)] section of [Account Settings].
![]()
Save Time by Adding the Snippet to Template Files
To avoid manually adding the tracking code to each page, you can instead add it to the head, header, or footer template source code.
However, this will only work if the element is automatically loaded on to each new webpage on creation.
Step 6:
Verify Snippet Installation
Return to the analytics platform to confirm that the tracking code has been installed correctly.
If so, the tracking code status will appear green. You can find this in the [Tracking Code] section of [Website Settings], which is in the vertical left-hand navigation menu.
You can further verify snippet installation by reloading the dashboard after visiting your live website to see this visitor data displayed.
For Sites Created Using a Website Builder
If you're using one of the following platforms, we recommend referring to the linked installation guide for step-by-step instructions:
Other Platforms
We're constantly working to improve the tracking code installation process for all website builder platforms so watch this space for updates!
Having Trouble Installing the Tracking Code?
Contact Our Client Support CenterGetting Started with Analytics
Once the tracking code is installed, you can start using all the analytics tools.
Have a read through some of the guides below to learn how to get the most out of them:
What Are Heatmaps? The Only Guide You Need
What Are Session Recordings and How to Get the Most Out of Them
What Are Conversion Funnels? A Guide for Digital Marketers
The Complete Guide to Getting the Fundamentals of Your Website Right
How to Use Website Surveys and Polls to Boost Your Digital Marketing Activities